LangGraph makes it easy to wire simple, reliable LLM workflows as graphs, and in this post we will build a tiny two‑node graph that turns a topic into a joke and then formats it as a mini conversation ready to display or send.
By the end, you will have a minimal Python project with a typed JokeState, one LLM node (write_joke), one pure‑Python node (wrap_presentation), and a clear sense of where to go next in future articles.
What Needs Research Now
- Confirm the exact installation commands and package names for LangGraph, LangChain, and your model provider SDK.
- Confirm how to compile and run a
StateGraphfor your installed version, including whethergraph.compile()is the correct method. - Confirm how to set the entry node in your version, either by adding an edge from
STARTor using a dedicated setter. - Confirm the expected environment variable names for your chosen provider, for example
OPENAI_API_KEYfor OpenAI orANTHROPIC_API_KEYfor Anthropic. - Decide whether to start from the
new-langgraph-project-pythontemplate or a plain Python project.
What We Are Building
We will create a minimal LangGraph app with two nodes and a small, explicit state.
The flow will be simple: topic in, the LLM generates a joke, deterministic Python wraps it as a conversational presentation, and the graph ends.
Where LangGraph Fits
- LangGraph represents workflows as cyclical graphs with nodes and edges, and it manages
stateacross steps. - Nodes are Python functions that read and write pieces of the graph
state. - This makes it straightforward to mix deterministic logic with LLM calls while keeping the flow controllable and observable.
Project Setup
So that we can focus on the implementation of our nodes, let’s follow some procedural steps to get a working LangGraph system in place.
- Install the core libraries.
pip install --pre -U langgraph
pip install --pre -U langchain
pip install -U langchain-openai
- Set your model provider API key in the environment.
# For OpenAI via langchain-openai
export OPENAI_API_KEY="your_api_key"
- Create a new Python file, for example
app.py, where we will put the code below.
Define the Graph State
We will pass a small, typed JokeState between nodes, containing the topic, the generated joke, and the final presentation.
# python
from typing import TypedDict

class JokeState(TypedDict):
    topic: str
    joke: str
    presentation: str
The state forms the basis of the graph’s progress. As nodes return, the state is updated with new values and the whole state is the input to the next node.
Implement the Nodes
Node 1: Generate a joke with an LLM
We will use a LangChain prompt plus an LLM to produce a short joke from the topic.
from langchain_openai import ChatOpenAI
from langchain_core.prompts import ChatPromptTemplate

# Prompt + model chain: "Tell me a short, clean joke about {topic}"
llm = ChatOpenAI(model_name="gpt-4o")
prompt = ChatPromptTemplate.from_template("Tell me a short, clean joke about {topic}")
joke_chain = prompt | llm

def write_joke(state: JokeState) -> dict:
    # Use the topic from state and ask the LLM for a joke
    resp = joke_chain.invoke({"topic": state["topic"]})
    # Return a partial state update that LangGraph will merge
    return {"joke": resp.content}
When the write_joke node is executed, the current state is the input and the values from it can be used for the LLM prompt.
The joke_chain is invoked with key-value pairs in a dictionary and this completes the template for the LLM.
The ChatOpenAI instance needs OPENAI_API_KEY to be set in your environment to be able to access the OpenAI service.
The returned dictionary is used to update the state so that the joke entry is overwritten with the joke the LLM provided.
Node 2: Wrap the joke deterministically
This node is pure Python, so it is fast and deterministic, not requiring a network connection.
def wrap_presentation(state: JokeState) -> dict:
    joke = state.get("joke", "").strip()
    presentation = f"Hey, have you heard this one?\n{joke}\nHa ha ha!"
    return {"presentation": presentation}
All this node does is take the joke from the state, wrap it with a predetermined opener and some laughter.
This content is added to the state when the node returns replacing presentation with the newly wrapped joke.
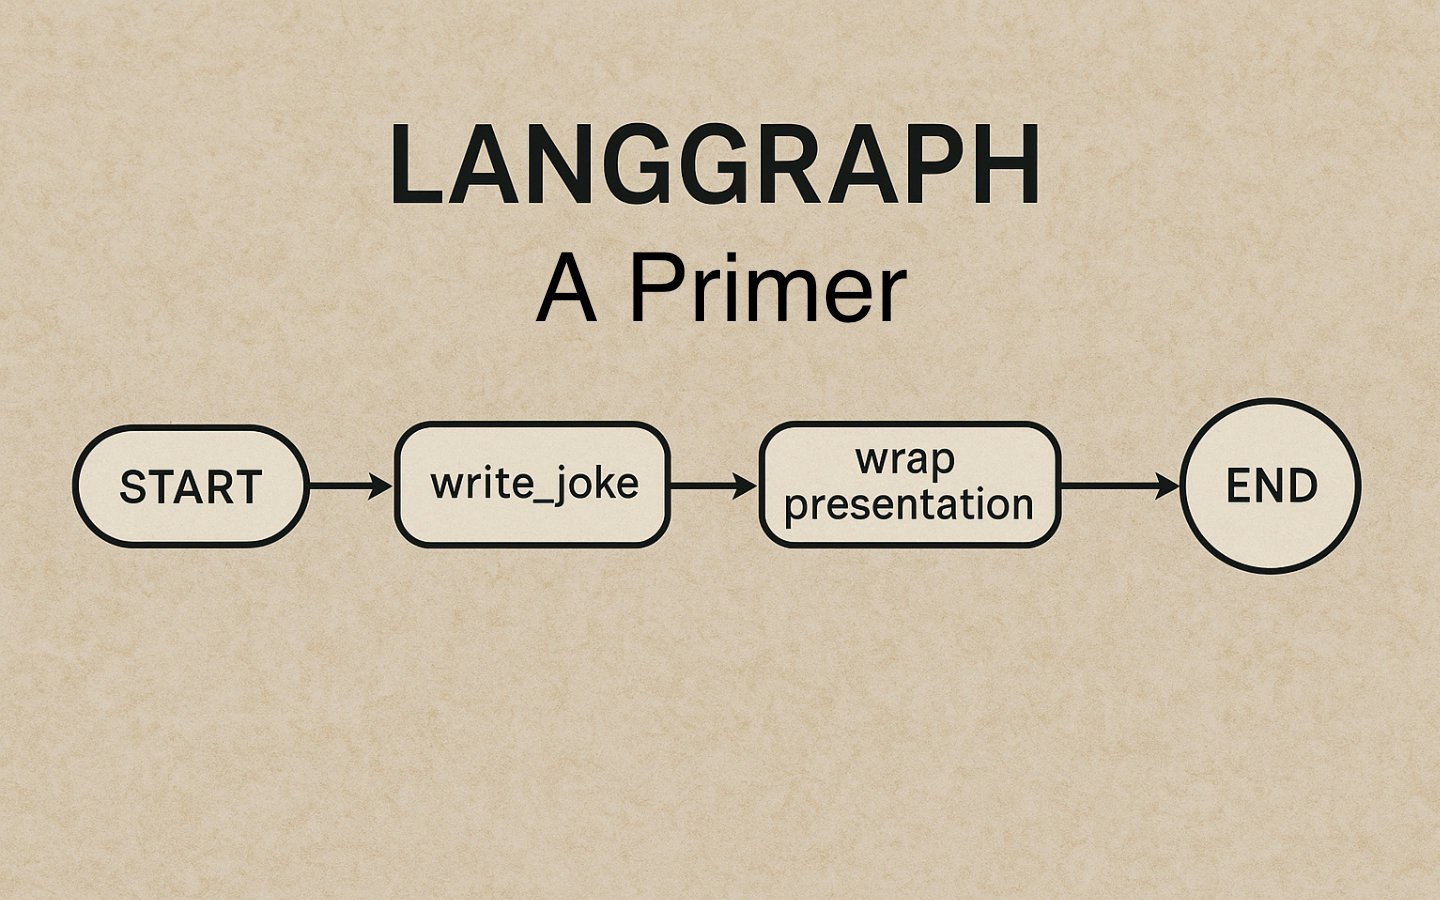
Wire Up The Graph
We will connect the two nodes in a straight line and end the graph after formatting the presentation.
from langgraph.graph import StateGraph, START, END

# Create a graph that operates on our JokeState
graph = StateGraph(JokeState)

# Register nodes
graph.add_node("write_joke", write_joke)
graph.add_node("wrap_presentation", wrap_presentation)

# Wire edges
# Start -> write_joke -> wrap_presentation -> END
graph.add_edge(START, "write_joke")
graph.add_edge("write_joke", "wrap_presentation")
graph.add_edge("wrap_presentation", END)

# Compile/build the runnable app from the graph
# Confirm the exact method for your installed version
app = graph.compile()
- The special
STARTsymbol sets the entry point for the graph, andENDmarks termination.
Run It
Invoke the compiled app with an initial state that provides only the topic, and let the nodes fill in the rest.
if __name__ == "__main__":
    # Minimal initial state
    initial = {"topic": "bicycles"}
    result = app.invoke(initial)
    print("Presentation:")
    print(result["presentation"])
- The
stateis the backbone of the workflow, with each node returning updates that LangGraph merges as the graph runs. - You can expand
JokeStateover time to carry extra context or intermediate artefacts.
Wrapping Up
You have assembled a tiny LangGraph app with one LLM node and one deterministic node, all glued together by a clear typed JokeState.
This pattern scales from toy examples to robust agents by adding nodes, edges, routing, and persistence while preserving control over how your system behaves.
In future articles we will add more complex operations, parallel execution, and decision nodes to deepen this foundation.